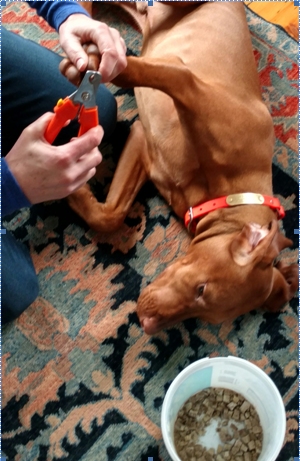
Terrific: Cash calmly lets me do his nails
Quick and dirty clearly wasn’t working here, so I switched to the slow and steady method of systematic desensitization and counter conditioning. Here are the steps I took to get Cash on board with nail clipping:
- Downs with toe nail clippers present. Sit on a rug with your dog on leash. Put the clippers on the ground between you. Feed a treat. Now work on downs making sure your dog can see the clippers. Reward frequently. Stay at this step until your dog lies down and stays equally well when the clippers are present as he does without them. If your dog lays sphinx style, start using a treat to get him to shift onto one hip or onto his side.
- Touching toes with your hands. Once again, have your dog lie down and have the clippers on the rug between you. Ask your dog to stay. Touch a paw with one finger. If he stays still, reward (I use freeze dried liver for toenails—the treats should be something wonderful that your dog doesn’t usually get). If he moves, no treat, and instead try something easier like touching his forearm.
- Holding a paw. Now try to hold a paw with in your hand as if you were clipping the nail. At first, just hold the paw, but you will need to progress to gripping the toe and extending the nail as if you were going to cut it. As before, reward if you dog cooperates; try something easier if he moves.
- Holding a paw AND touching toenails. As in number 3, hold the paw and extend the nail. Now touch the actual toenail with your other hand. Progress to holding the nail and then to pinching the nail hard.
- Add the clippers. Once again, hold one paw as if you were ready to cut the nail. While holding the paw, pick up the clippers, put them down, and reward your dog. If that goes well, on the next trial you will move them a little closer to the foot. Continue until you can touch the clippers to the toenail. Remember, you still aren’t cutting the nail!
- Cut your first nail. Once your dog will lie calmly while you pick up a paw, extend the toenail, and touch it with the clippers, you are ready to start trimming nails. Your goal for your first session should be to trim just a tiny bit, 1/8 inch, off of one toenail. Then celebrate! Tons of liver and call it a day.
It took about two weeks of working on this for ten minutes a day before we got to step six and got one nail cut. I continued to work on it daily for a couple more weeks, getting anywhere from zero to five nails cut in a session. I’m happy to report that Cash now competes with Ally to see who can get their pedicure first! He still sometimes gets worried and pulls a paw away, but he is miles better than when we started.
Now I’m gearing myself up for our next toenail adventure: The Dremel. Cash is starting his show career at six months and he needs to have perfectly manicured feet, which is usually done with a dremel—a rotary sanding tool. I’ve never used one-it sounds too much like a dentist’s drill to me! I can’t imagine Cash is going to love it right off the bat, but I’m sure we’ll get there 🙂
Like On Good Behavior on Facebook!![]()